.webp)
.webp)

How to Find and Remove Unused Azure Virtual Network Gateways
Reduce cloud costs by finding and removing unused Azure virtual network gateways. Follow our guide to identify and delete them effectively.
Reduce cloud costs by finding and removing unused Azure virtual network gateways. Follow our guide to identify and delete them effectively.


Azure virtual network gateways, made up of two or more Virtual Machines (VMs) attached to a given subnet, are the mechanism commonly used to bridge encrypted data traffic between cloud networks and on-premises locations over the internet.
If your organization has Azure gateways that are not being used, they need to be cleaned up to reduce security risks and lower your cloud costs.
In this guide, we will show you how to find Azure virtual network gateways that are not being used, and then delete them from your account.
Finding gateways with no connections requires some manual reviewing. Here are two methods for approaching it:
1. Log in to the Azure portal menu and select or search for “All resources”
2. Select a virtual network gateway.
3. Click Connections on the blade for your virtual network gateway to see the status of each connection. If there are no connections listed, then the gateway is unused and a candidate for removal.
4. If you want to verify a connection, click to open “Essentials”, which will show if the status is 'Succeeded' and 'Connected'. If the status is not ‘Succeeded’ and ‘Connected’, the connection is not active.
Once you find gateways that are not in use, you can move to the next step of deleting them.
1. List all of your virtual network gateways. You can run the following command and specify by resource group.
2. List all the connections for a given gateway with this API call:
You’ll see an output like this that shows the connections related to the specific gateway:
If a gateway returns no value, then it has no connections and you can move to delete it.
Once you have identified any virtual network gateways that have no connections, or ones that you know you want to remove, next you need to delete them. Here are the steps:
1. Go to the virtual network gateway.
2. Delete any connections.
3. Delete the virtual network gateway.
1. Disconnect existing connections.
If you identify that a gateway has connections, but is still no longer needed, you should first remove the connections before you delete the gateway. Make sure this will not disrupt any operations that you want to continue.
2. Delete the virtual network gateway:
You can use the following command to delete a specific gateway:
Follow these steps for each gateway and you’ll be able to find and remove all unnecessary gateways.
By following the steps above, you can find and remove unused gateways, but it's a time-intensive process. Depending on your scale, the manual reviewing required with this approach might be unfeasible.
If you want to run this check for unused gateways regularly and at scale, you need automations to help make this task routine.
With Blink, you can use this automation to identify gateways with no connections and queue them for removal.
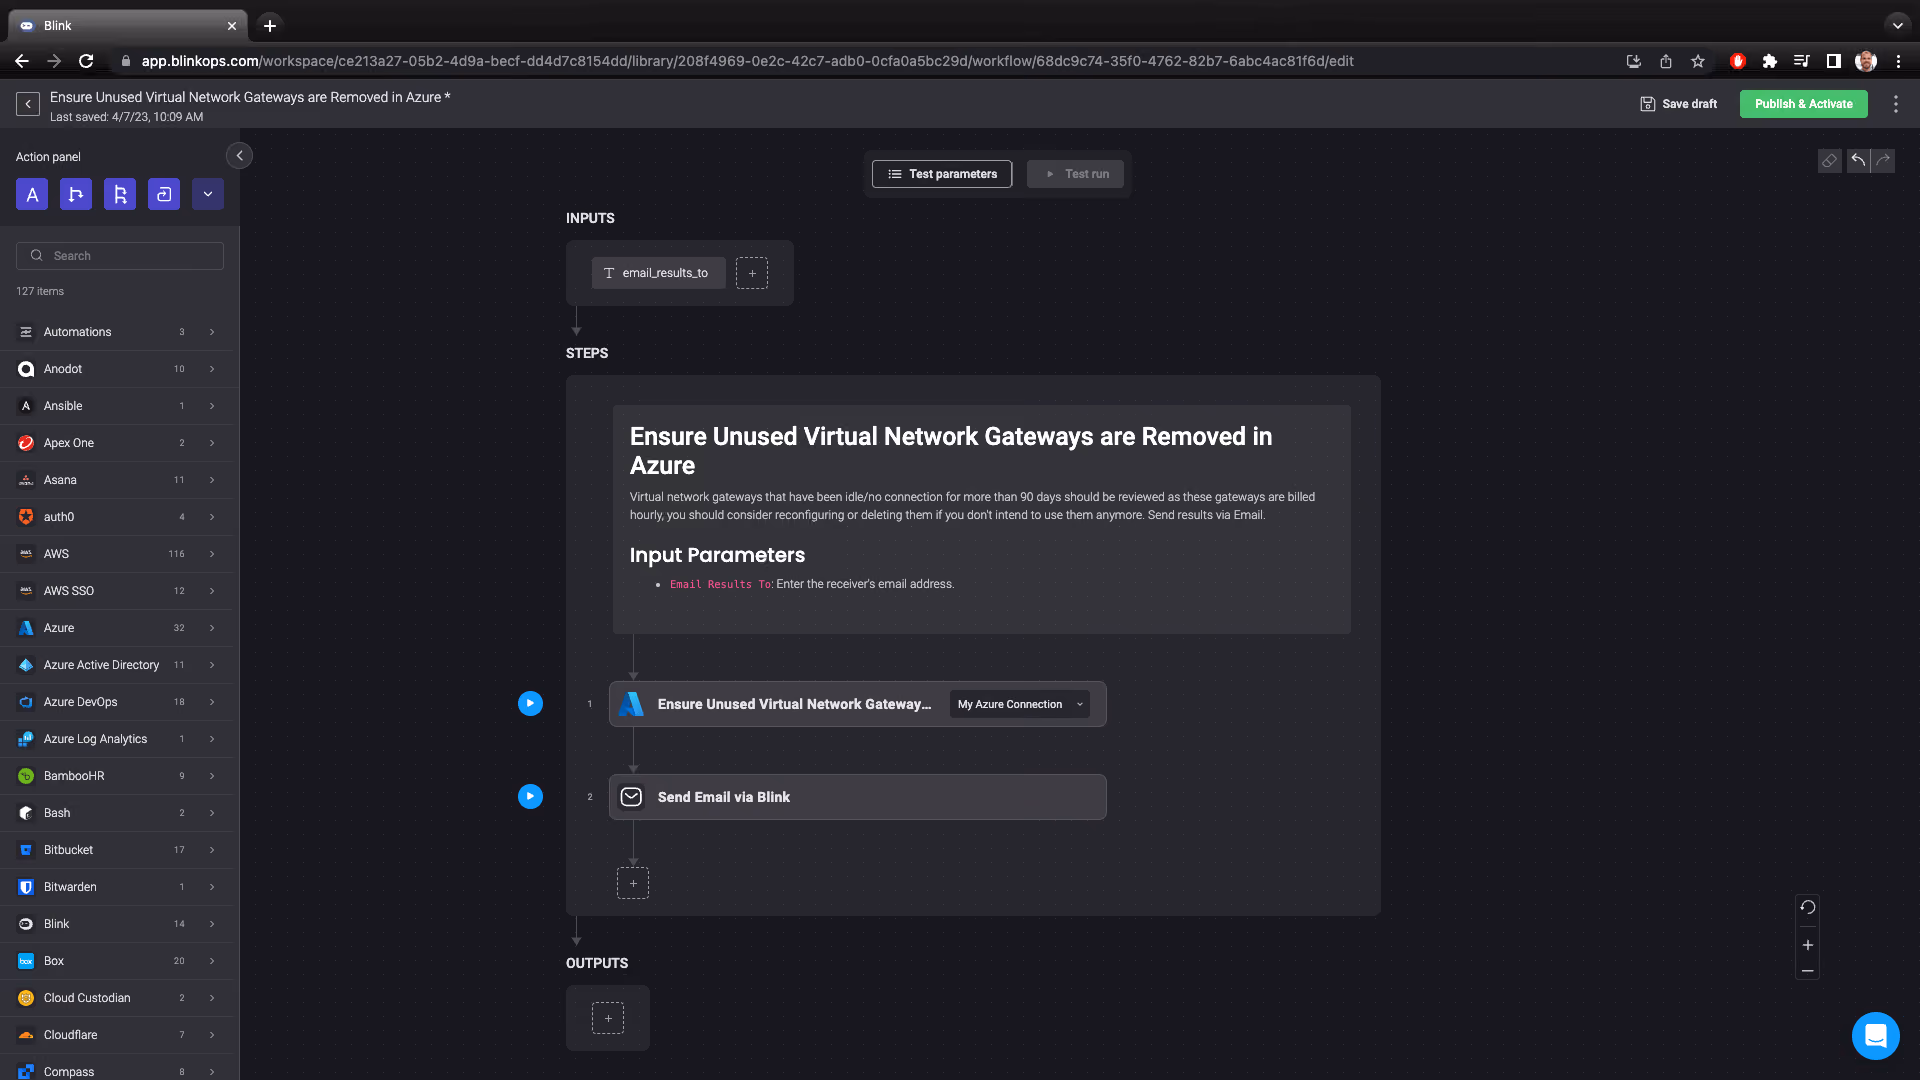
When this automation runs, it executes the following steps:
You can also customize this automation to add a removal step for unused gateways if approved via Slack.
There are over 5K automations in the Blink library you can use right away, or you can build new automations from scratch with drag-and-drop actions to fit your unique use case.
Get started with Blink today to see how easy automation can be.
Blink is secure, decentralized, and cloud-native. Get modern cloud and security operations today.


