.webp)
.webp)

How to Create GCP Disk Snapshots and Snapshot Schedules
Learn how to create snapshots and set up snapshot schedules for GCP disks. Ensure data resilience and backup with our guide.
Learn how to create snapshots and set up snapshot schedules for GCP disks. Ensure data resilience and backup with our guide.


Google Cloud Platform (GCP) disk snapshots are copies of data contained on persistent disks connected to your instances. Snapshots house information about data held on that disk during a specific period.
While the first snapshot includes all data on a disk, subsequent copies only contain information relevant to subsequent changes. It’s essential that you learn to carefully manage your GCP disk snapshots to keep your instances functioning correctly.
You can use snapshots to restore a version of an instance, within or across projects. Compared to creating a full image, GCP disk snapshots are easier to create on a persistent disk and cost less.
Snapshots are created based on the last successful snapshot. Subsequent copies refer to the previous snapshot for any data that did not change, and the incremental nature of GCP disk snapshots helps organizations avoid getting billed for redundant information.
To consistently create snapshots, you can create snapshot schedules that automate snapshot creation at a certain interval. We’ll show the steps for creating schedules later in this post.
First, let's show how you can create a snapshot manually.


You can take GCP disk snapshots using gCloud CLI or the Google Cloud Console.
1. Open the Google Cloud console, then go to the Create a Snapshot page.
2. Add a name for your snapshot.
3. Use the drop-down menu to pick the correct Source disk.
4. Decide which snapshot storage location to use. Go to Location and pick Regional or Multi-regional.
5. Select the correct region or multi-region to use for your snapshot. You can pick Based on disk’s location to use the default location closest to your area.
6. Click the Create button.
Open the CLI and enter the following command. Substitute your information for the parameters in brackets.
As you can see, creating snapshots with the gCloud CLI is pretty simple, but you likely won't want to rely on a manual process. That's where snapshot schedules come in.
By scheduling the creation of GCP disk snapshots, you can maintain a regular or automatic backup for Compute Engine workloads.
As a best practice, you should schedule snapshots to be created early in the morning or at another low-traffic time of day, as they can be taken more quickly during these off-peak hours. Avoid scheduling the snapshots at the end of a business day or at midnight. These are the times when snapshot activity is at its peak.
It’s also important to set a retention policy for your snapshot schedules. Otherwise, snapshots will be kept indefinitely which can add to your data storage costs.
Scheduled GCP disk snapshots must be created in the same zone as your GCP disk. For instance, if the GCP disk region is in us-west1-a, your snapshot schedule must be in the us-west1 location.
These are the steps for creating a snapshot schedule using the console:
1. Go to the VM instances page in the Google Cloud console.
2. Click the name of the VM with a persistent disk that you want to create a snapshot schedule for. If you want to create a snapshot schedule for a Boot disk or Additional disk instead, you can select it under Storage.
3. Click edit, and choose Create a schedule under Snapshot schedule.
4. In Name, you can enter one of the following names:
5. You can then select Location. Regional snapshots offer more control of where your data is located at a lower cost, but the default is Multi-regional which are higher availability and higher cost. Select whichever best maps to your needs.
6. Click Create and click Save to attach the schedule to the persistent disk.
Once you have created the snapshot schedule, you can attach it to other disks by selecting it from the dropdown menu in the Snapshot schedule section while editing the Disk Details page.
1. Create a snapshot schedule using the gCloud command “compute resource-policies create snapshot-schedule”. Set an hourly, weekly, or daily snapshot schedule by including the related parameters.
2. To validate that the schedule has been created, you can run this command:
3. Next, you need to attach the schedule policy to a disk with this command:
4. If you want to create a new disk that uses this schedule, you can use this command:
With these steps, you can create and implement snapshots schedules. By collecting snapshots regularly, you’ll reduce your risk of losing data if a disaster hits and ensure a certain level of resilience.
You can create snapshot schedules and attach them to disks manually, but it might be hard to develop and scale a consistent strategy.
With Blink, you can easily attach snapshot schedules to disks based on certain parameters, check retention policies, and remove old snapshots. By using no-code automation steps, you have the ability to develop the kind of snapshot strategy that can help ensure consistent recoverability at an efficient cost.
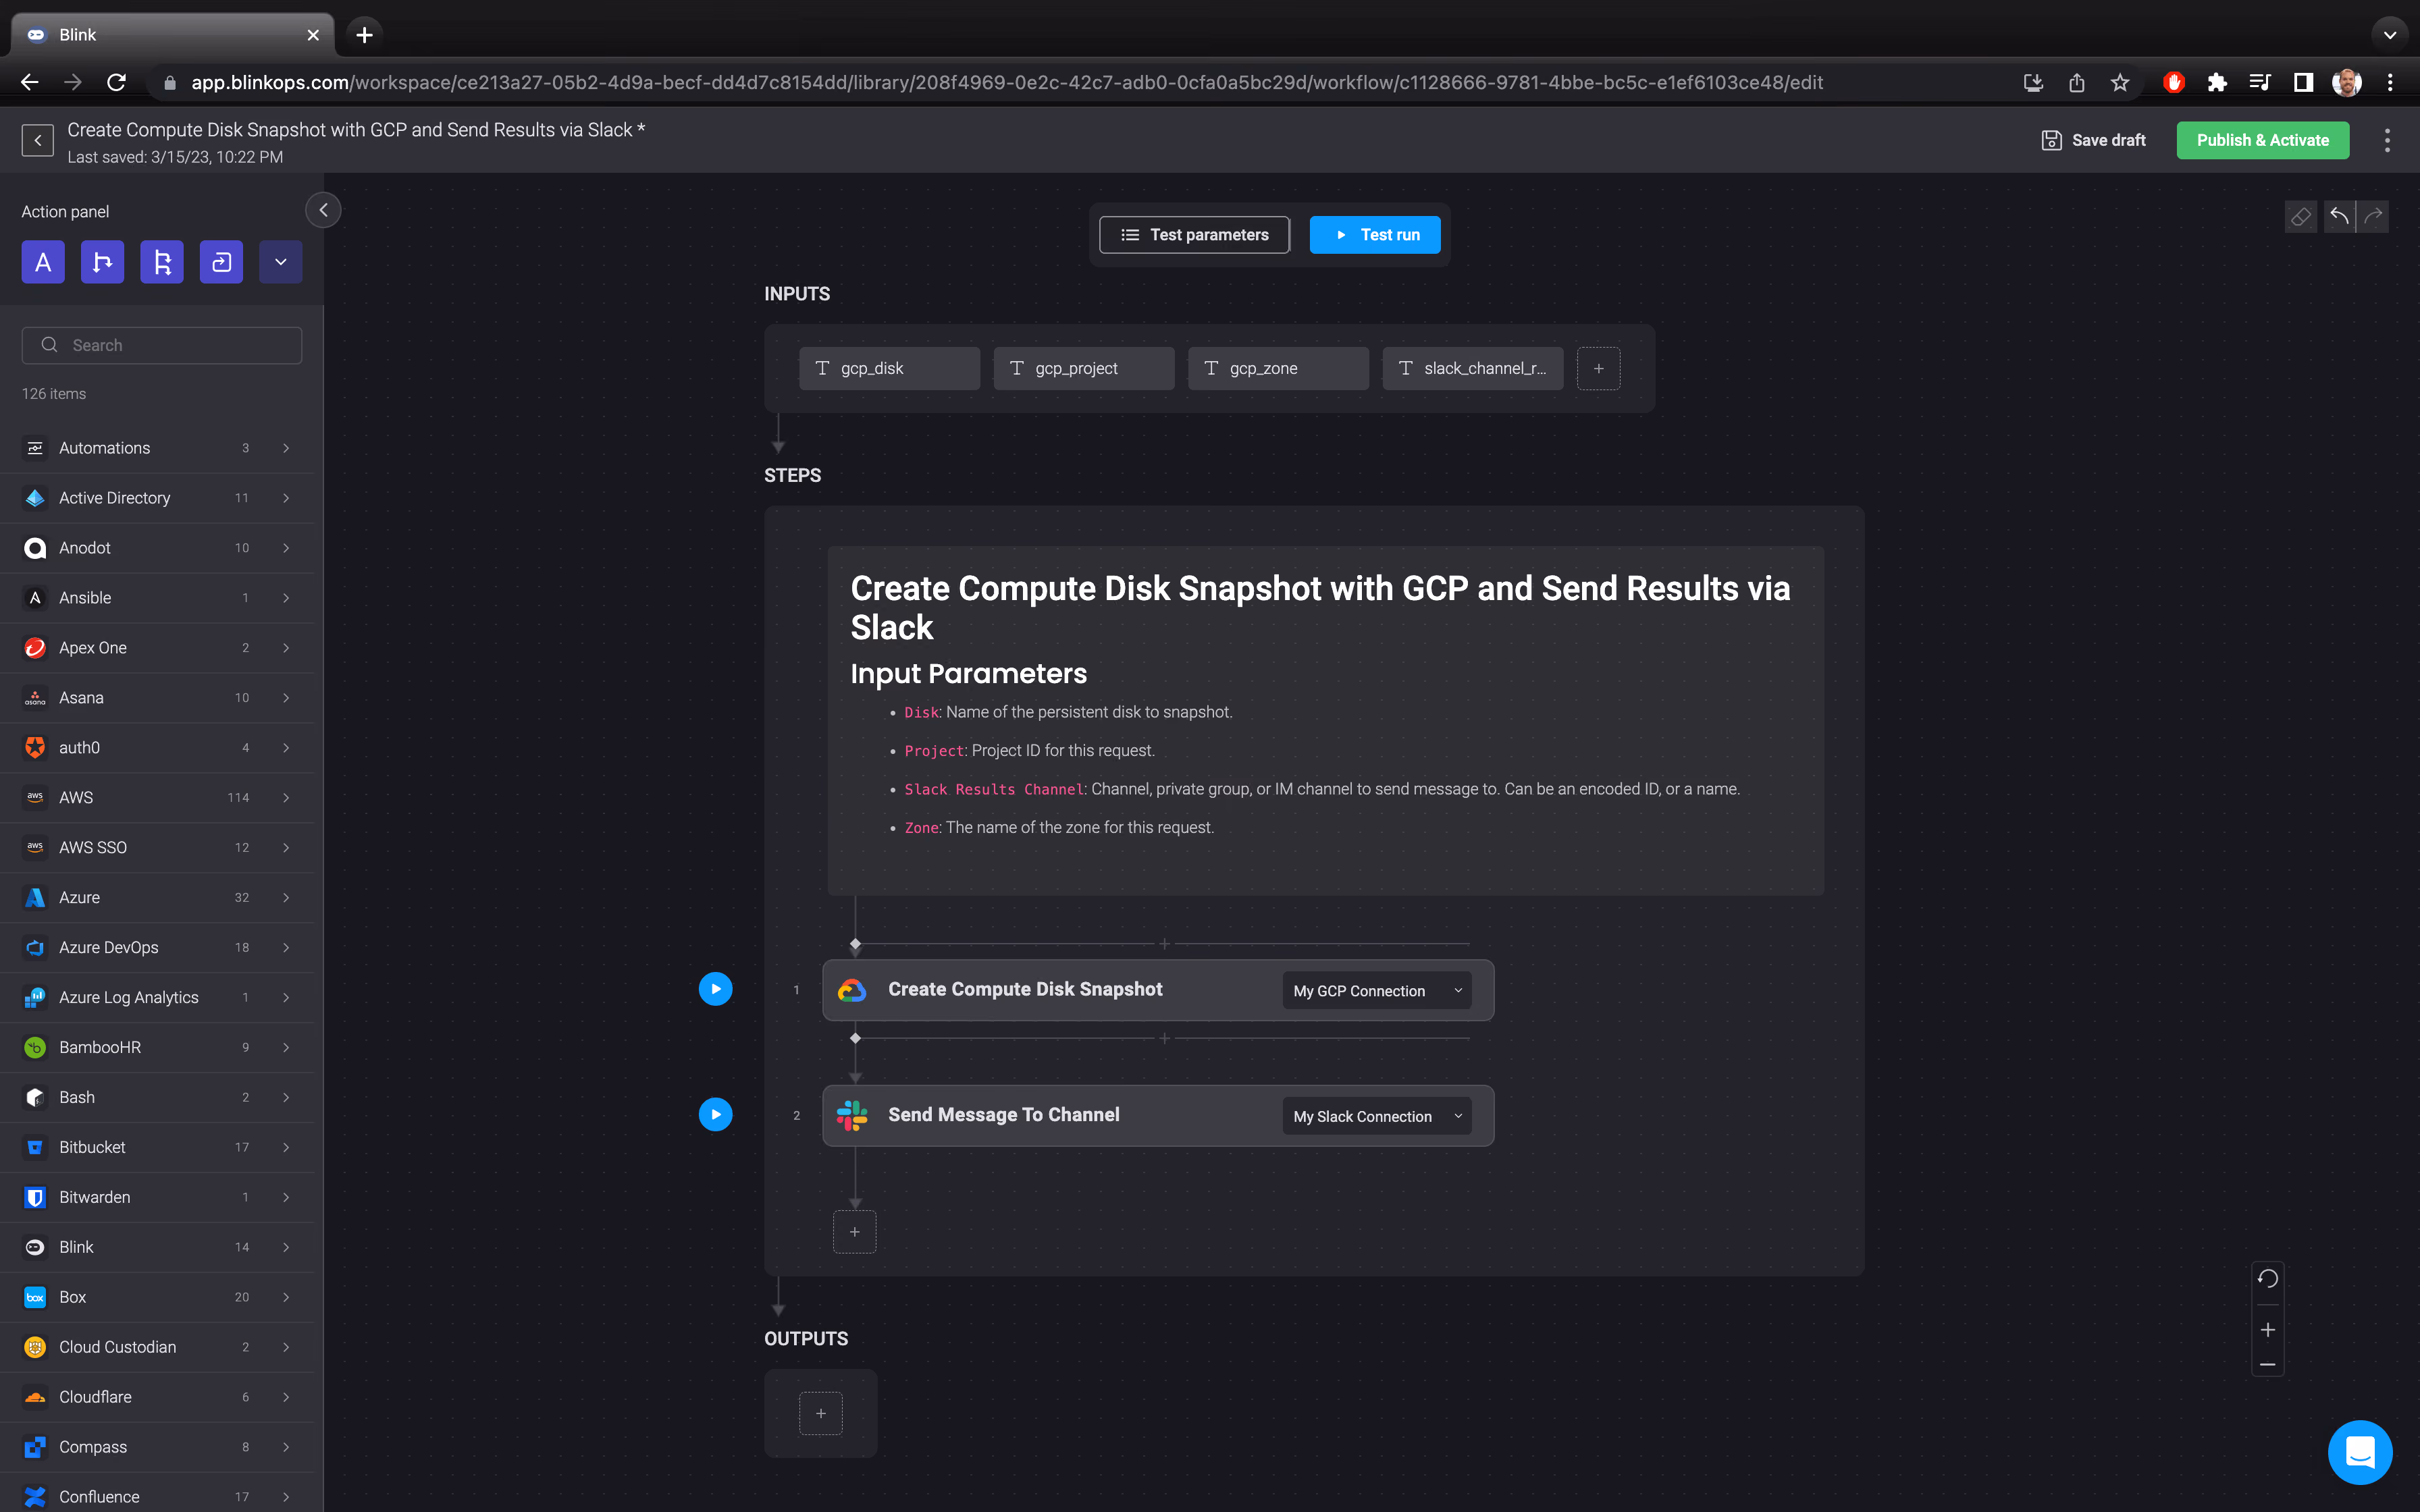
This GCP automation in the Blink library relies on a few input parameters like which disk, project, and region is relevant to the snapshot.
With this information, the automation runs the following steps:
This is a simple automation, which makes it easy to customize based on your organization’s needs. For example, you can drag-and-drop new actions into the canvas or set up conditional logic.
You can build your own automation from scratch or use one of our 5K pre-built automations today.
Get started with Blink today and see how easy automation can be.
Blink is secure, decentralized, and cloud-native. Get modern cloud and security operations today.


